

Beaches: a photographer’s paradise.
It seems like everywhere you look, photo ops abound! Beaches are so beautiful, it’s nearly impossible to take a bad picture.
However, there are certain challenges that arise during beach photography. You’ll definitely want to avoid taking a photo that only includes sand, water, and sky, which can make even the most beautiful beach look dull and unimpressive. It’s also important to remember to keep your horizon straight. Read on for some tips on how to take great beach photos!
8 tips for the best beach photography
Beach Photography Tip 1: Experiment with different times of day.
Although there is no right or wrong time of day to take photos at the beach, different times of day produce different lighting which can make for very different pictures.
Photography enthusiasts flock to the beach during the ‘golden hour’ – the first or last hour of sunlight, which produces lovely warm, soft light.
The sky at sunrise and sunset usually has vibrant colours that photograph very well. The beach will also be less crowded during this time. Another good time for photos is 10-15 minutes after sunset or 30 minutes before sunset. This is the ‘blue hour’ (which is actually more like half an hour). During blue hour, the beach will be bathed in soft blue light.
In dim lighting, use a two second shutter speed, a tripod to avoid blurriness, and the mode dial TV or S on your camera.
If you do want to take pictures during the middle of the day, the overhead lighting may cause harsh shadows. At midday, you can use your camera’s flash to get rid of overhead shadows, or lean into the use of shadows to create some very dramatic shots.
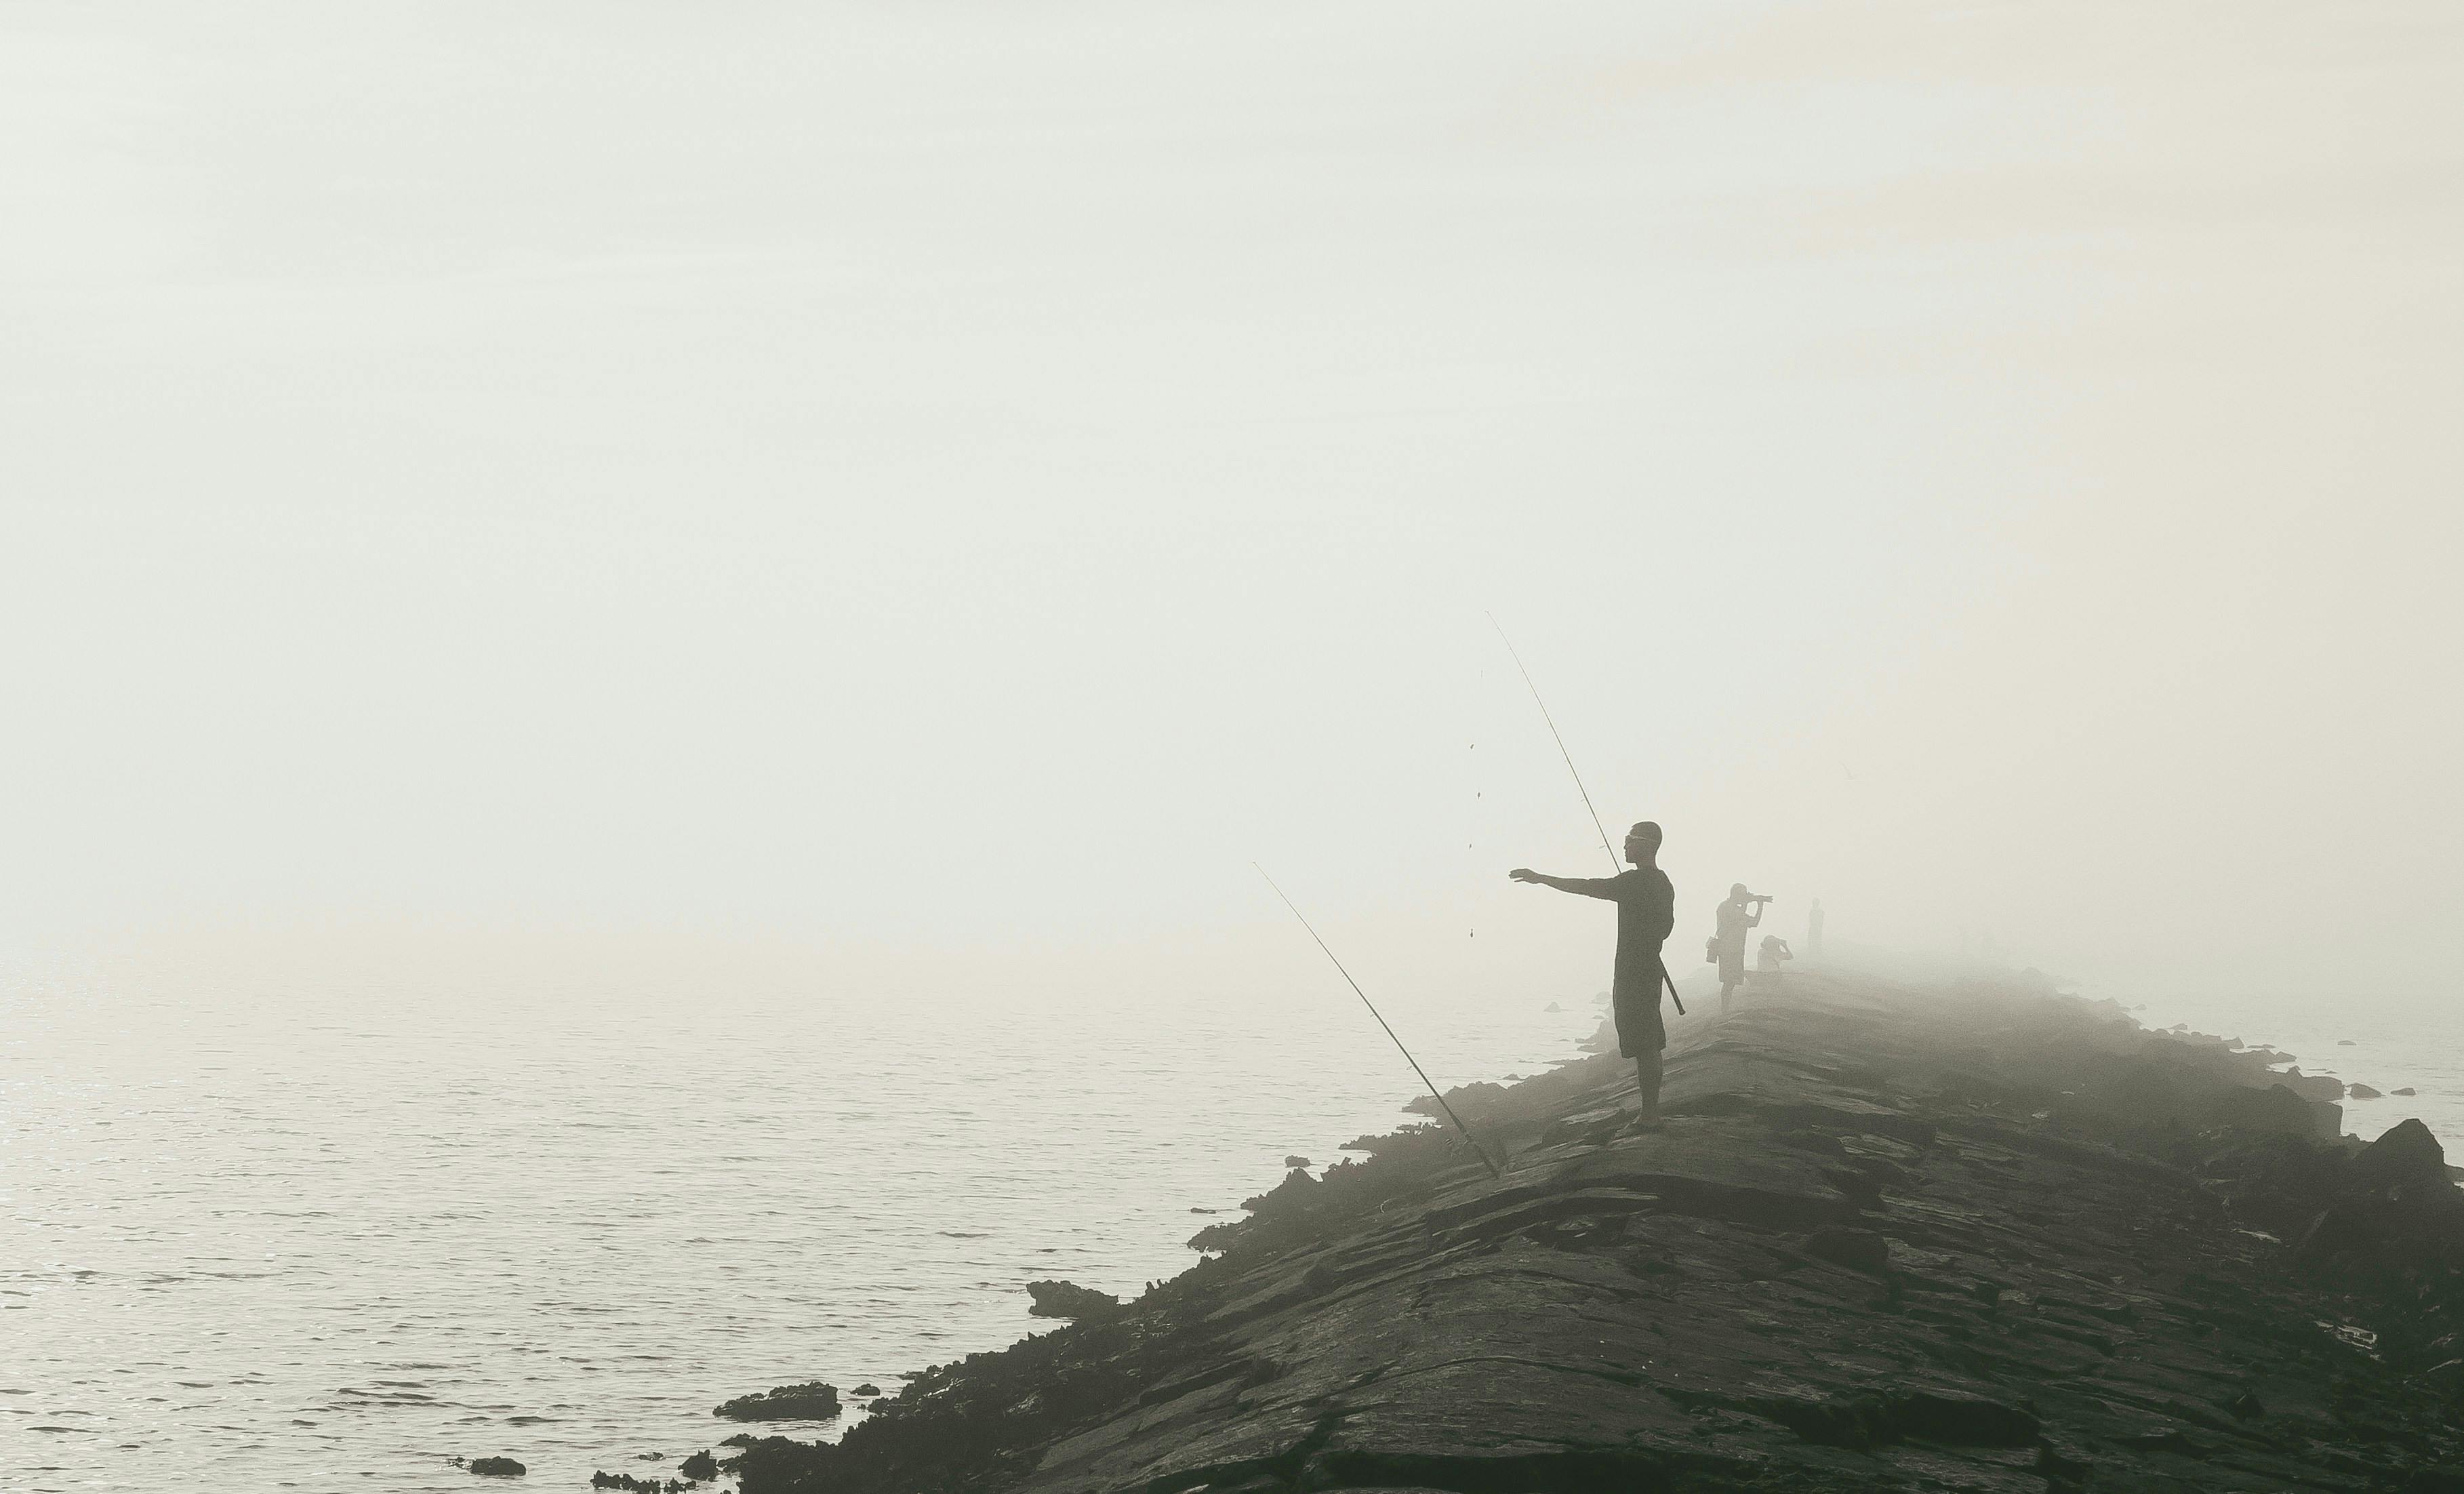
Beach Photography Tip 2: Play with the weather
Don’t be afraid to photograph the beach in less than sunny conditions. Soft, overcast lighting can produce flattering portraits. Fog can create a mysterious atmosphere. Storm clouds can create drama!
Even winter, with its blanket of pristine snow and ice formations, can make a breathtaking beach photo. This season brings unexpected beauty to the beach, turning it into a winter wonderland.
Beach Photography Tip 3: Consider the tide conditions
The beach can look virtually unrecognizable when the tide is in versus when the tide is out. When the tide is out, and much of the shore is exposed, you can capture photos of the sandy beach or tide pools. If you want to get shots of the waves, they will be at their most powerful about an hour before high tide.
Learning to read a tide table will help you choose the right time to go to the beach to get your desired photo. It will also keep you from being stranded if the tide comes in. The last thing you want is to get cut off from the beach while you’re on the rocks trying to get that perfect shot!
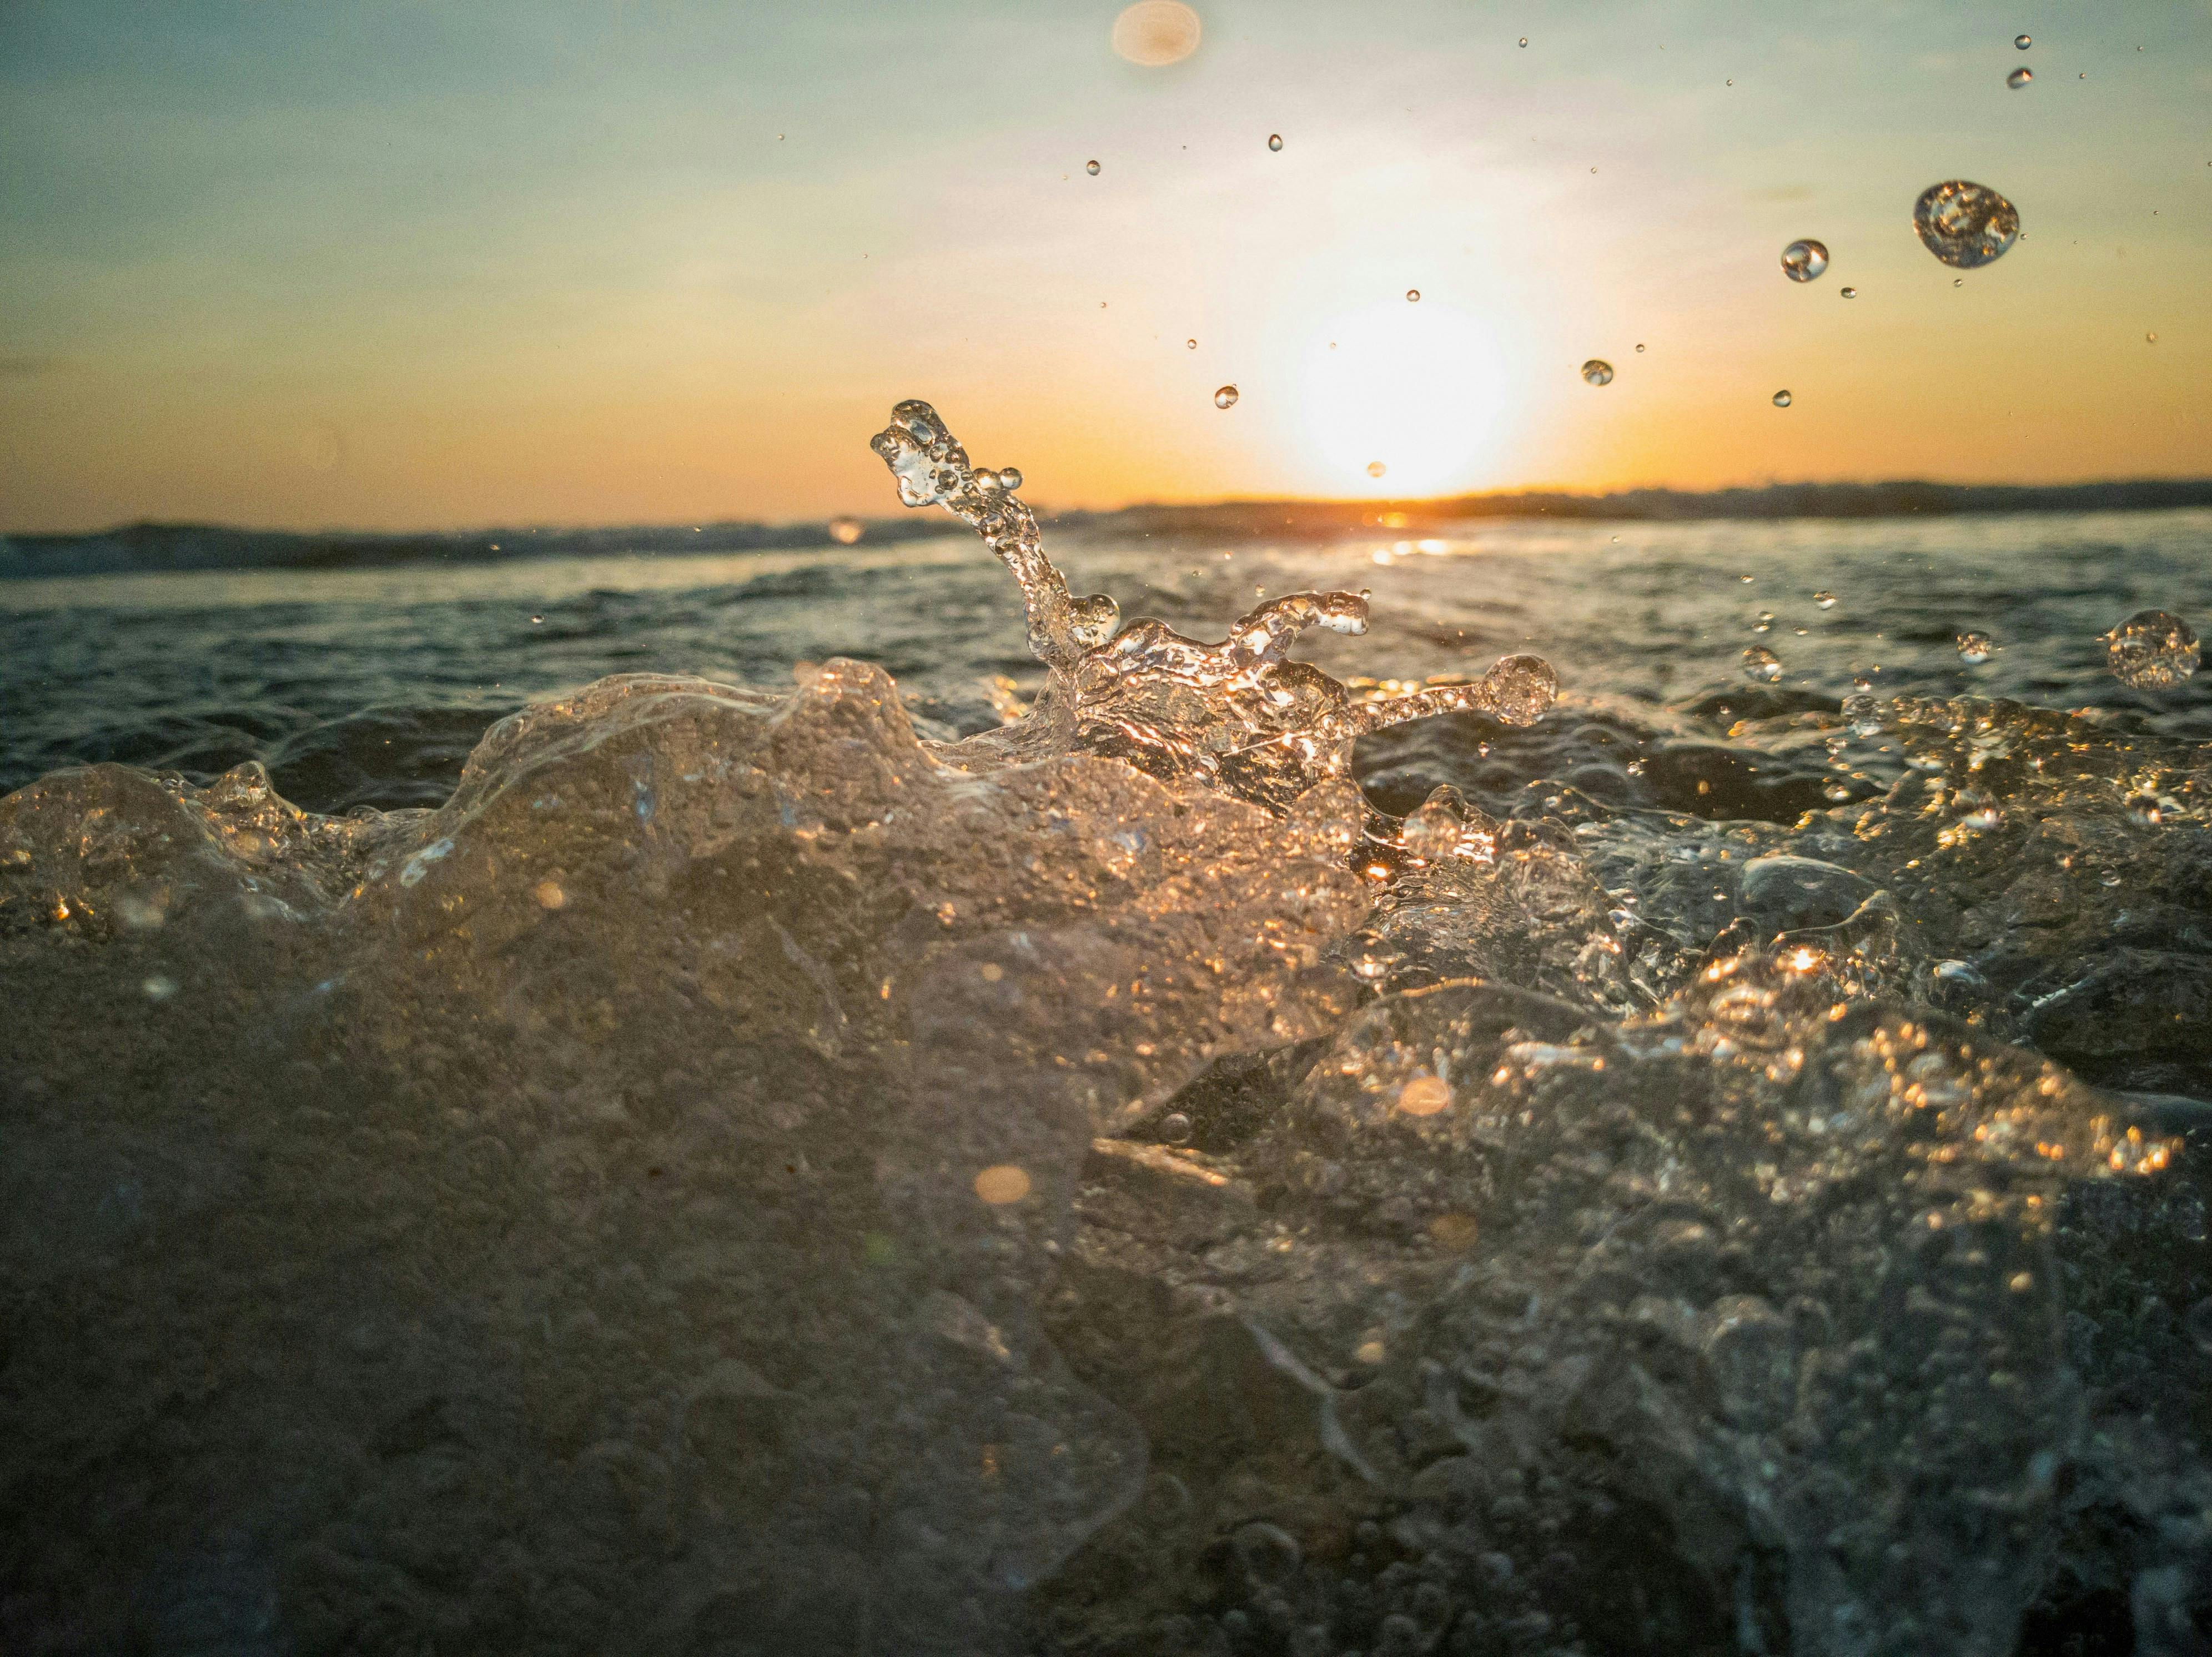
Beach Photography Tip 4: Show the water’s motion
Capturing the movement of the water can be tricky but rewarding. Different techniques can create vastly different results. Using a slow shutter speed can make the water look calmer, smoother, and more stylized.
Using a quick speed will 'freeze' the waves in motion and make them look more dynamic, sharper, and more realistic. Short shutter speeds or continuous shooting modes (also known as ‘bursts’) are ideal for taking photos of waves crashing on the rocks.
Beach Photography Tip 5: Flatter human subjects
Bright overhead sunlight can create unflattering shadows on a human subject’s face. To offset this, you can use flash, zoom in to reduce shadows, use a reflector, white towel, or other light-coloured object to reflect light onto your subject’s face, or keep your subject back-lit.
Wearing brightly-coloured clothing that will contrast with the blue colour of the ocean and sky will draw attention to your subject. Red, orange, and yellow will all help your subject stand out.
A quick shutter speed can capture someone who is jumping, surfing, or taking part in some other kind of water recreation.
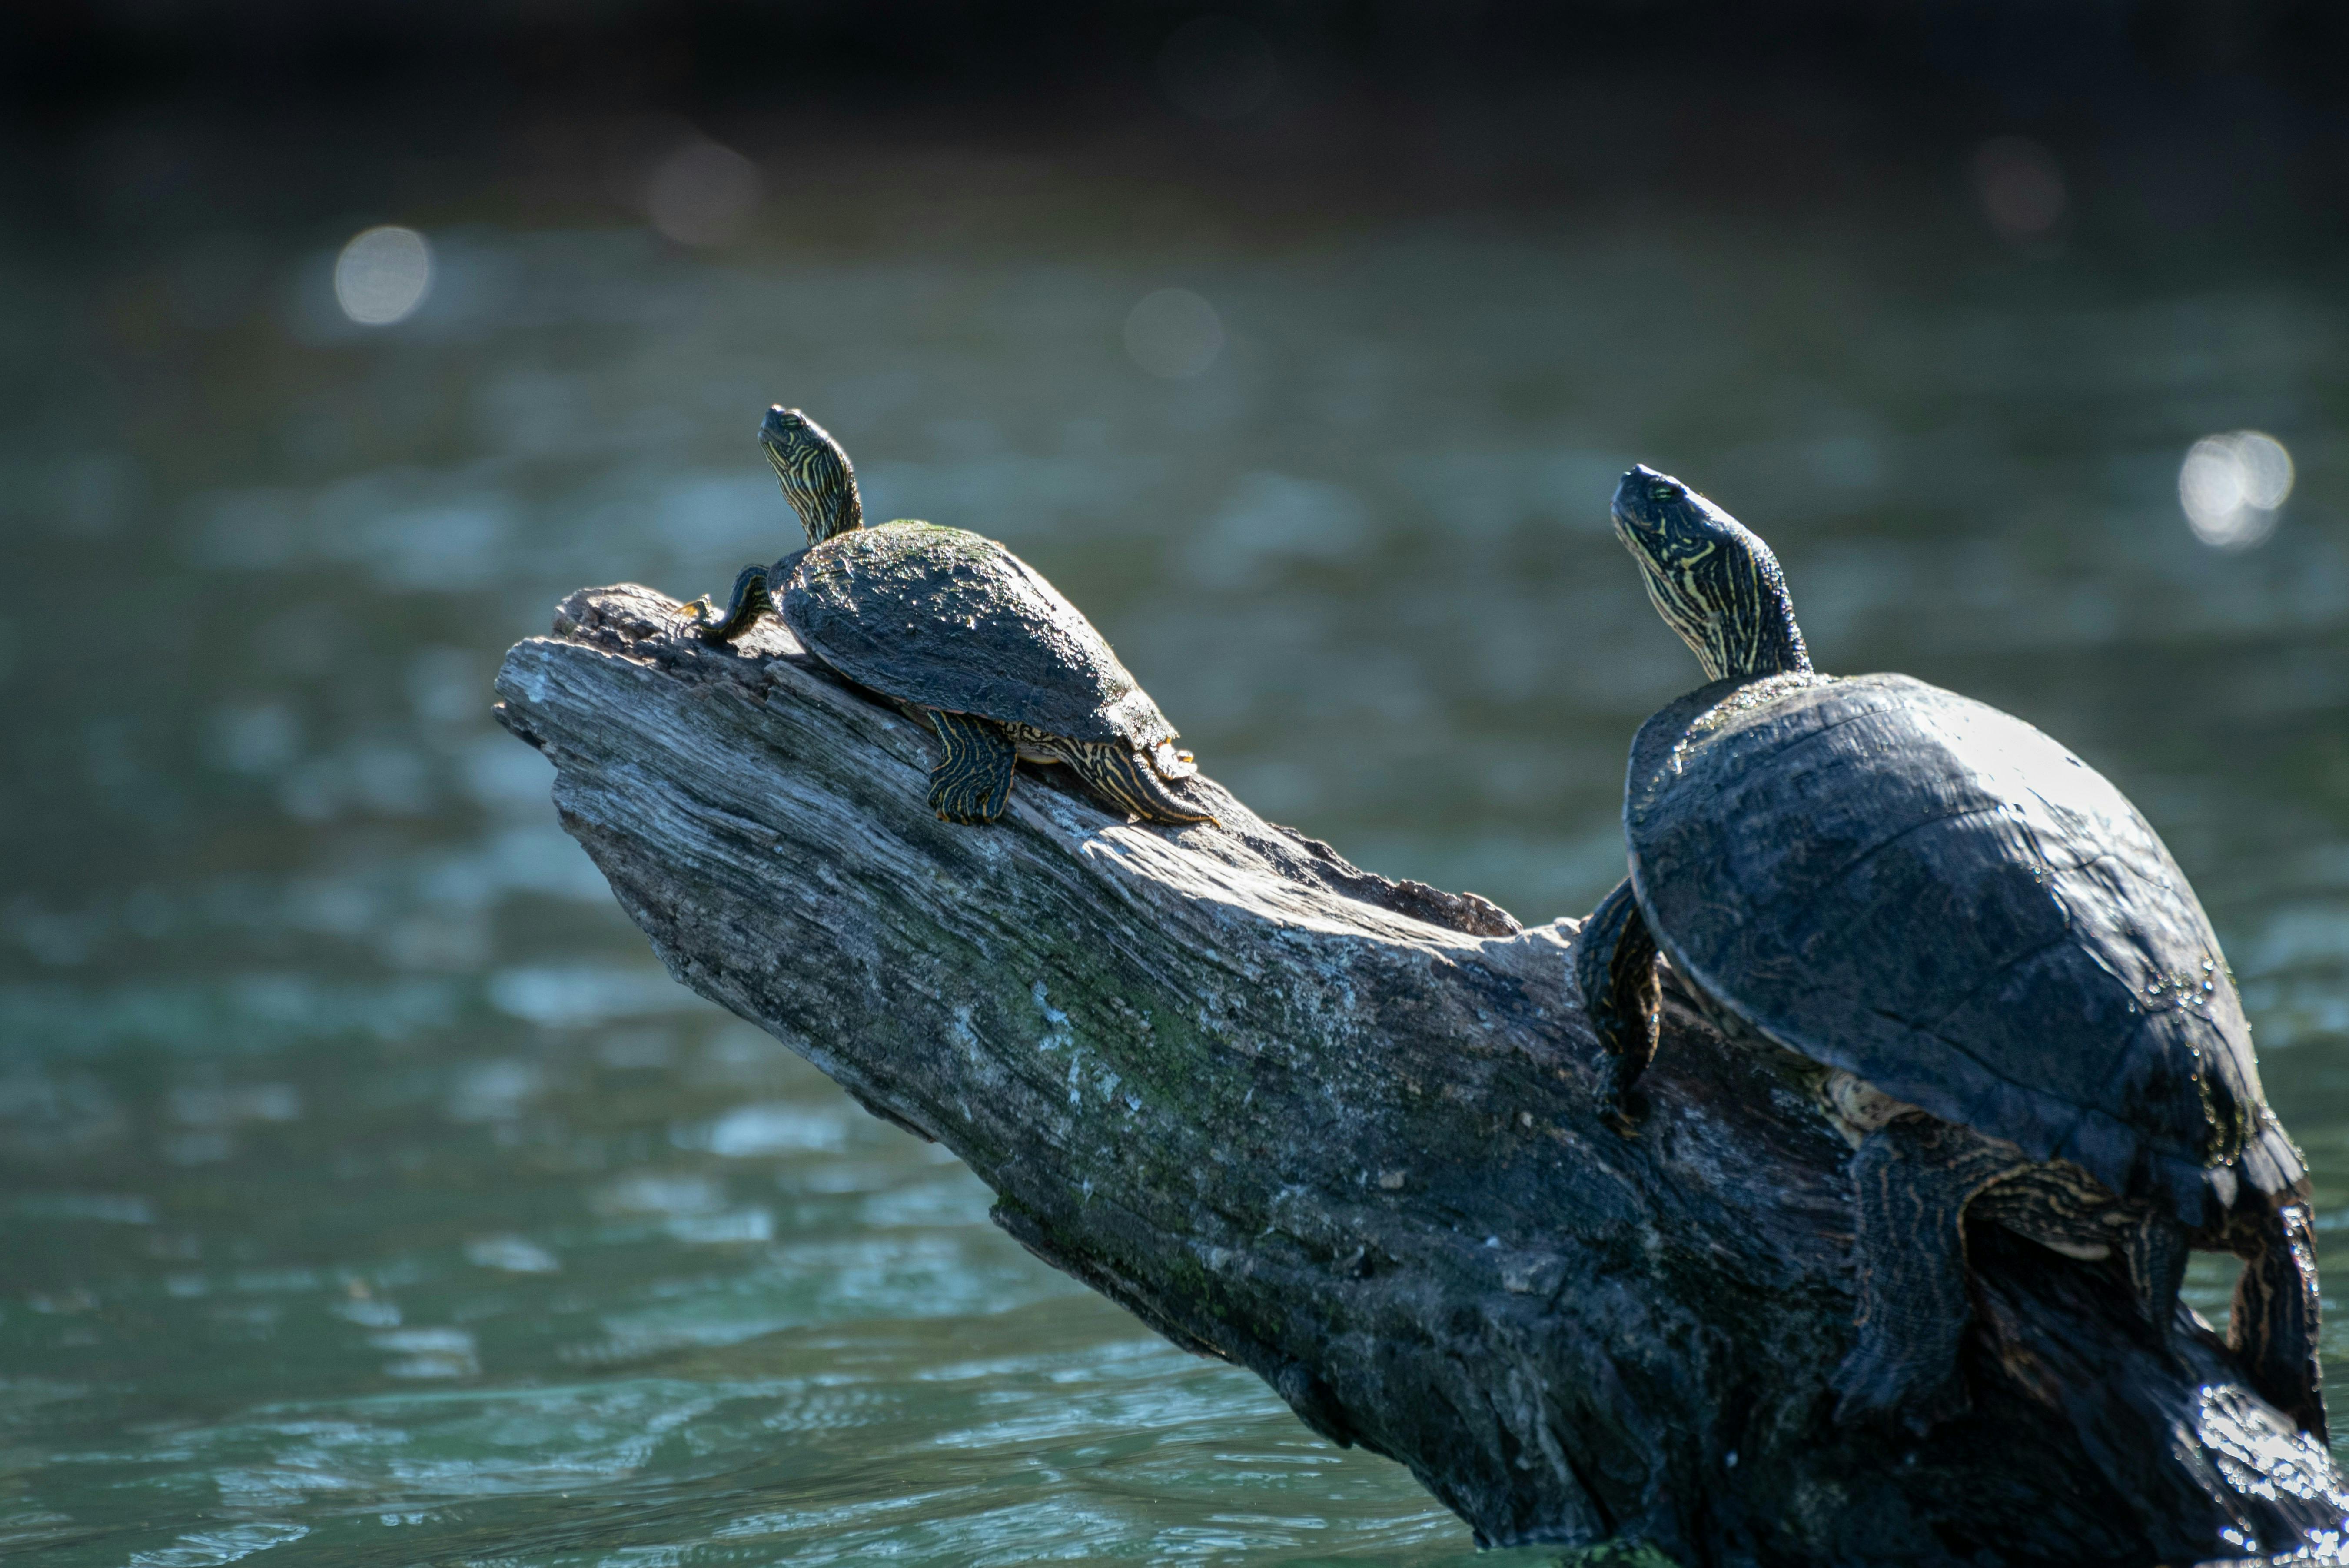
Beach Photography Tip 6: Capture animal subjects
The beach is an excellent place to take photos of wildlife. The most important thing to remember when you’re taking photos of animals is that you’re in their home, and it’s vital to respect their space. Be cautious about where you step and always be on the lookout for sea turtles and their eggs, nesting birds, beach-spawning fish, and other types of marine life.
A good zoom, shallow depth of field, and fast shutter speed are musts for photographing birds in flight. If you underexpose photos, lightly coloured birds and feather patterns will be easier to see. The best time to photograph birds is near the end of the day, when they feed on the food left on the beach.
Sadly, you can’t rely on animal subjects to strike a pose and stay still until they hear you say, “Say cheese!” When photographing animals, line up your shot in advance of the anticipated movements of the animal and the waves.
To photograph marine life such as fish underwater or crabs in tide pools, use a polarizing filter to reduce reflections and a macro lens to capture detail.
Beach Photography Tip 7: Get creative
Pictures of just the ocean can be commonplace. There are lots of ways to take unique photos. One easy way is to include an interesting focal point like a boat, pier, person, or wildlife.
The beach is full of reflections that can take your photo from good to great. Reflections of the sky, people, boasts, or birds all make interesting photos. To take a crystal clear reflection, make sure the water is still (although water ripples can create a more distorted, abstract effect).
Focusing on details, such as sand, driftwood, rock textures, footprints, shells, or seaweed can make compelling shots. You can even arrange beach debris like sea glass or pebbles into your own compositions on the sand. Use macro settings when getting close.
Unexpected vantage points can create new perspectives. Crouch down on the sand to include dune grass in the foreground of your photo, or trek to the top of a cliff (but be careful!) for a birds eye view. You can also take pictures of the shore from in the water for a different viewpoint.
Creating silhouettes by positioning your subject in front of the sun can create a striking effect and make a beautiful background stand out. When photographing a silhouette, set your exposure to the light behind your subject.
Beach Photography Tip 8: Protect Your Equipment
The sandy shores, salty water, and blazing heat from the sun can all damage your camera and accessories.
If you decide to bring a DSLR camera, make sure you’re storing your equipment in a sand, water, and wind-tight bag. Never change or open and close your lens while at the beach, or sand and moisture may be blown in. Bring along lens cloths or lens wipes, and gently clean your camera as soon as you get back home.
Keep your own safety in mind as well. It’s all too easy to get caught up in taking photos and fall on slippery rocks or get knocked over by a wave.
When in doubt, leave the fancy camera at home and bring your smartphone instead. Smartphones are great for beach shots, especially newer models that are weather sealed. GoPros and other action cameras can also be a lot of fun at the beach. Even better, they’re water sealed and designed to be submerged.
Think of the underwater shots!
Taking photos is a fantastic way to document your day at the beach.
We’d love to see your photos! You can tag us in your photos by tagging them @swimguide, or, if you see pollution at the beach, report it at the Swim Guide.
For more photography tips, check out this blog by Pixpa.